
The fade haircut is a timeless classic, offering a sharp and clean-cut look that complements a variety of hairstyles. It seamlessly transitions from short on the sides and back to longer hair on top, creating a stylish and versatile aesthetic. But achieving that perfect fade at home can seem daunting, especially for beginners. Fear not! This blog post will equip you with all the knowledge and techniques to master the fade haircut in the comfort of your own bathroom.
Key Takeaways
- Understand the different types of fades (low fade, mid fade, high fade) to choose the style that best suits your preference.
- Master the tools of the trade: clippers with adjustable guards, combs, and a mirror (or two!).
- Learn proper cutting techniques, including establishing a guideline, fading with clipper guards and the lever, and cleaning up for a polished finish.
- Gain valuable tips and tricks for a smooth and successful fade haircut experience.
- Explore resources for further learning, including video tutorials.
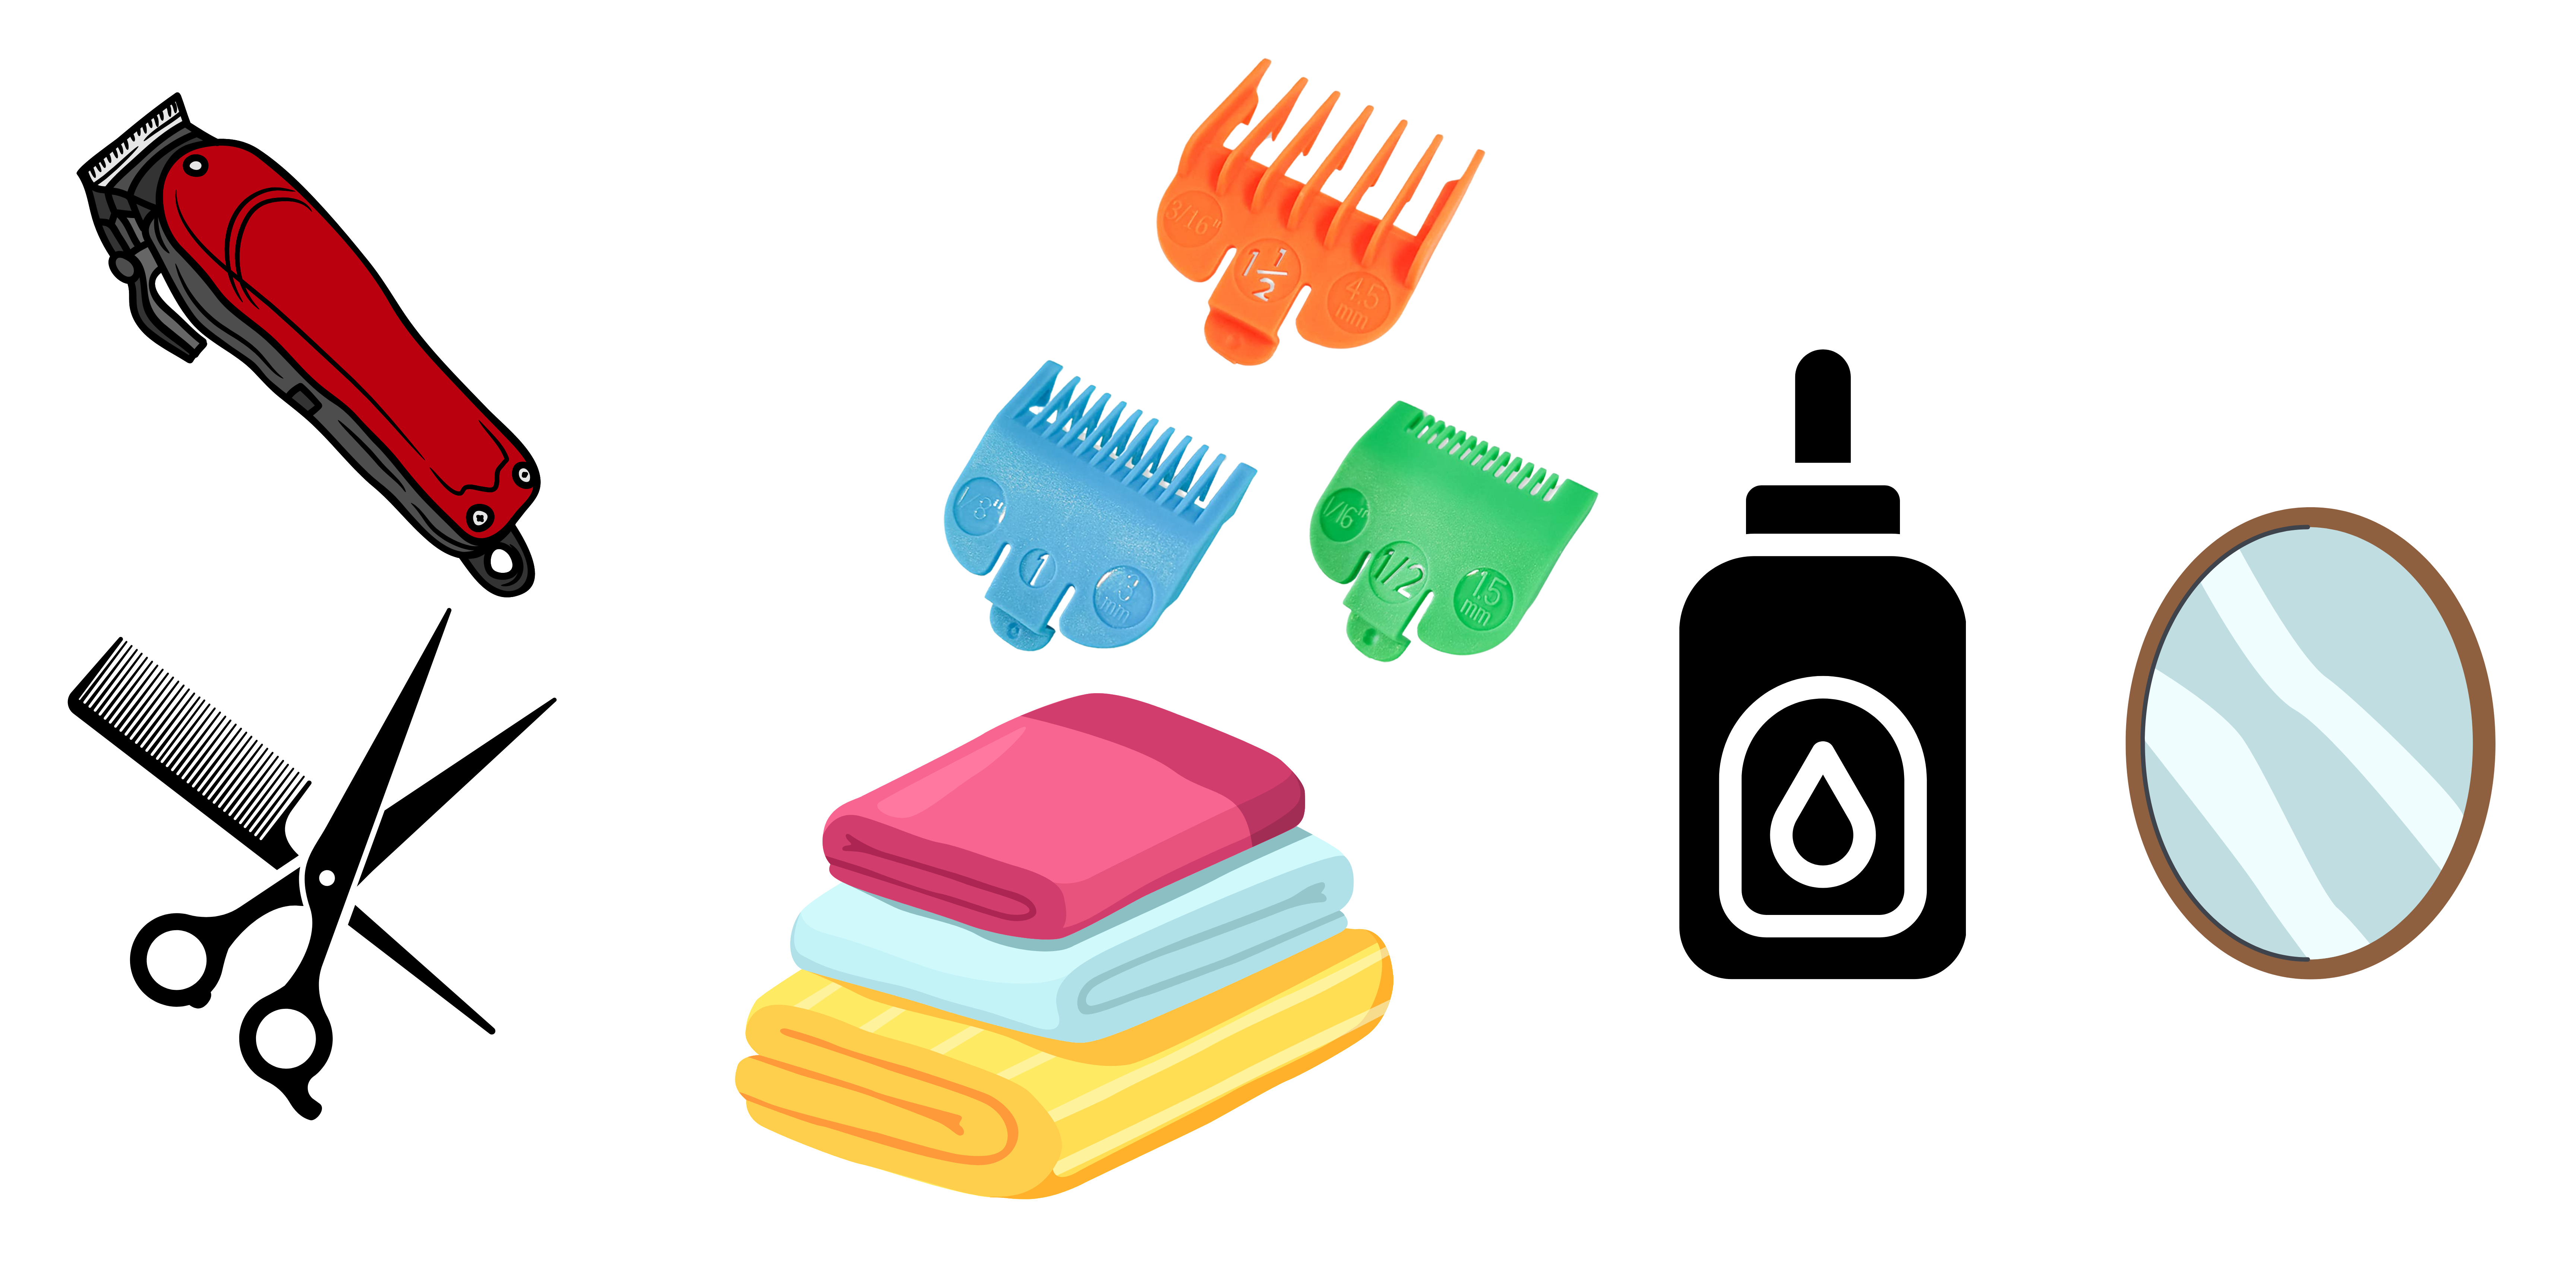
Before You Begin: Gearing Up for Fade Success
- Guards: These attachments determine the hair length left behind after clipping. A variety of guards allows you to create the desired fade gradient.
- Combs: You’ll need a fine-toothed comb for sectioning hair and a clipper-over-comb attachment for fading with precision.
- Mirrors: Having two mirrors (one in front and one behind) allows you to see all angles of the head for a more even fade.
- Cape/Towel: Protect your clothes from stray hairs with a barber cape or a towel draped around the shoulders.
- Hair Clippers: Electric clippers are the essential tool for cutting hair during a fade.
- Clipper Oil: Regularly oil your clippers to maintain smooth operation and extend their lifespan.
Choosing Your Fade: A Guide to Different Styles
The beauty of the fade haircut lies in its versatility. Here’s a breakdown of the most popular fade styles to help you pick your perfect cut:
- Low Fade: This subtle fade starts just below the crown of the head and gradually tapers down to a short length on the sides and back. Perfect for those who prefer a more conservative look.
- Mid Fade: The fade begins around the middle of the head, creating a more prominent contrast between the longer top hair and the shorter sides. Ideal for a balanced and stylish look.
- High Fade: This bold fade starts high up on the sides, sometimes reaching the temple area. It offers a sharp and dramatic contrast, ideal for those who like to make a statement.
Mastering the Technique: A Step-by-Step Guide to Fading Hair
Now that you’re armed with the right tools and chosen your desired fade style, let’s dive into the haircutting process:
1. Prep and Section:
- Wash and dry hair completely. Damp hair can be tricky to cut and achieve an even fade.
- Use a comb to detangle and section the hair. Part the top hair away from the sides and back, securing it with a clip or hair tie.
2. Establish the Fade Line:
- With a clipper guard (start with a medium length like #4), begin clipping the sides and back, gradually working your way up to the desired starting point of the fade (low, mid, or high). This establishes your guideline.
- Use a comb for clean lines and to check for evenness.
3. Fading with Clipper Guards:
- Now comes the fade itself! Attach a shorter guard (e.g., #2) and begin fading just below the guideline. Use a clipper-over-comb technique for better control.
- Move the clippers upwards with a slight fading motion, gradually opening the lever on the clippers as you go higher. This creates a smooth transition between lengths.
- Repeat the process with an even shorter guard (#1) for the lower portion of the fade, ensuring a clean blend.
4. Lever Fading:
- Once you’ve established the initial fade with guards, it’s time for fine-tuning with the adjustable lever on the clippers.
- Start with the lever closed at the bottom of the fade line. As you move upwards, gradually open the lever to progressively shorten the hair. This creates a seamless blend between the faded section and the longer top hair.
- Be patient and take your time. Short, controlled strokes with the clippers ensure a smooth and even fade.
5. Cleaning Up:
- Once the fading is complete, use the fine-toothed comb to check for any stray hairs or uneven sections.
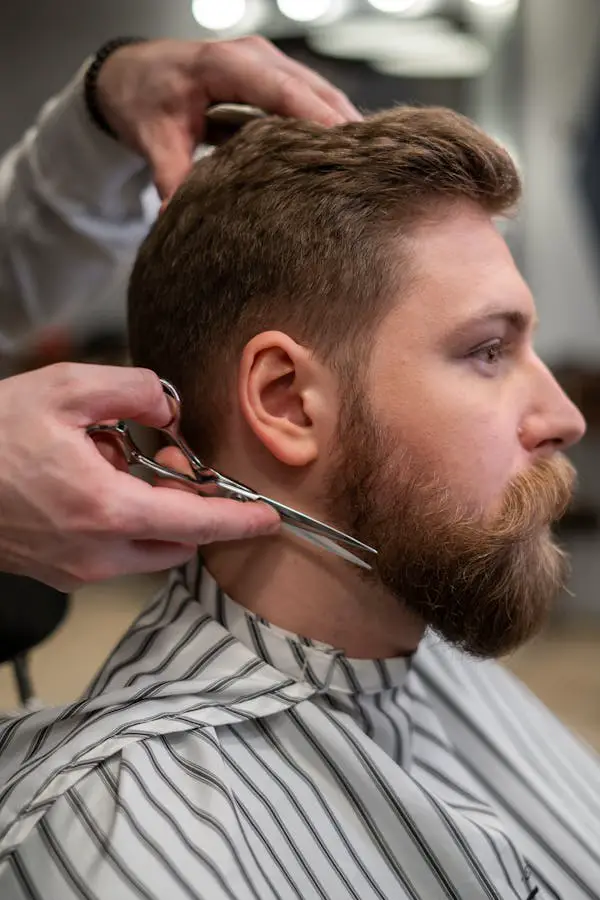
- Use the corner attachment of the clippers for precise detailing around the ears, neckline, and sideburns.
- You can also use a trimmer for closer fades or for shaping facial hair.
Pro Tips for a Flawless Fade
- Start Longer, Go Shorter: It’s always easier to remove hair than to add it back. Begin with a longer guard length and gradually work your way shorter to achieve the desired fade.
- Take Your Time: Rushing through the process can lead to uneven lines and patchy fades. Be patient and focus on controlled strokes for a clean and precise cut.
- Use Two Mirrors: Having a mirror in front and behind allows you to see all angles of the head, ensuring a symmetrical fade.
- Work with Clean Clippers: Regularly oil your clippers for smooth operation and to prevent pulling or snagging hair.
- Clean Up as You Go: Brush away loose hair frequently to see your progress and avoid accidentally cutting too much hair.
- Practice Makes Perfect: Don’t be discouraged if your first attempt isn’t salon-quality. Fading takes practice, so keep at it and you’ll see improvement with each haircut.
Common Fading Mistakes and How to Avoid Them
- Uneven Lines: This can happen if you don’t maintain a consistent cutting angle or don’t use a comb to guide the clippers. Focus on controlled strokes and utilize the comb for straight lines.
- Patchy Fade: This occurs when sections of hair are left longer than others. Take your time, use short strokes, and blend the fade gradually.
- Lines Not Blended: A harsh line between the faded section and the longer hair indicates an insufficient blend. Use the lever technique and clipper-over-comb method for a smooth transition.
- Cutting Too Short: Remember, it’s easier to remove hair than to put it back on. Start longer and gradually work your way shorter to avoid taking off too much hair accidentally.
Maintaining Your Fade
- Frequent haircuts (every 2-4 weeks) are essential to keep your fade sharp and defined.
- You can use a trimmer for minor touch-ups in between haircuts.
Beyond the Basics: Exploring Advanced Fade Techniques
Once you’ve mastered the basic fade haircut, you can experiment with more advanced techniques:
- Burst Fade: This fade features a short burst of hair left longer at the temple area, adding a touch of personality.
- Drop Fade: Here, the fade follows a curved line down towards the sideburns, creating a distinctive look.
- Skin Fade: This dramatic fade blends the hair seamlessly into the skin for a bald fade effect. (Caution: This requires more experience and precision.)
FAQs: Your Fade Haircut Questions Answered
- Can I do a fade haircut at home with no experience?
While it takes practice, a fade haircut is achievable at home even for beginners. Start with a low fade and longer guard lengths to minimize the risk of mistakes. Utilize the tips and techniques in this guide, and don’t hesitate to watch video tutorials for visual guidance.
- What clippers should I buy for a fade haircut?
Look for clippers with a powerful motor, adjustable guards (ideally #1 to #8), and a comfortable grip. Consider reputable brands known for barber-quality clippers.
- How often should I get a fade haircut?
For a consistently sharp fade, aim for haircuts every 2-4 weeks, depending on your hair growth rate.
- What if I mess up the fade?
Don’t panic! You can try to even things out with longer guard lengths or clippers. If the mistake is significant, it might be best to visit a barber for a fix.
- Are there any video tutorials I can watch to learn how to do a fade haircut?
Absolutely! Many online resources offer video tutorials that visually demonstrate the fade haircut process. Search for “fade haircut tutorial” on YouTube to find helpful guides.
Conclusion
With dedication and the right techniques, you can master the fade haircut and achieve a sharp, stylish look from the comfort of your own home. Remember, practice is key, so don’t be discouraged by initial hiccups. Embrace the learning process, and soon you’ll be giving yourself (or your friends) professional-quality fades that turn heads.
