")
Have you rocked stunning acrylic nails for weeks, but now crave a return to your natural look? Perhaps a chip or crack has marred your once-perfect set. Whatever the reason, you’re ready to ditch the acrylics. But a trip to the salon isn’t always convenient or budget-friendly. Fear not, fellow nail enthusiast! This blog post equips you with the knowledge and steps for safe and effective acrylic nail removal at home.
Key Takeaways:
- Acetone is essential for dissolving acrylics. Opt for 100% pure acetone for the fastest results.
- Patience is key! Soaking and gently removing acrylics takes time. Don’t pry or force them off.
- Protect your natural nails. Moisturize them regularly throughout the removal process and afterward.
- Consider using a non-acetone remover if you have sensitive skin or concerns about harsh chemicals.
Before You Begin: Gather Your Supplies
- 100% pure acetone (available at most beauty supply stores)
- Small bowl or dish
- Non-lint nail wipes (cotton balls can leave lint behind)
- Orangewood sticks or metal cuticle pushers
- Nail file or buffer (optional)
- Hand lotion or cuticle oil
- Aluminum foil (optional, for faster removal)
- Towel
Table 1: Acrylic Removal Essentials
| Item | Use |
|---|---|
| 100% Pure Acetone | Dissolves the acrylic layer |
| Bowl/Dish | To hold the acetone for soaking |
| Non-Lint Nail Wipes | Removes loosened acrylic and cleans nails |
| Orangewood Stick/Cuticle Pusher | Gently lifts and removes softened acrylic |
| Nail File/Buffer (Optional) | Smooths any remaining acrylic residue |
| Hand Lotion/Cuticle Oil | Moisturizes and nourishes natural nails |
| Aluminum Foil (Optional) | Traps heat for faster soaking (use with caution) |
| Towel | Protects surfaces and cleans spills |

Step-by-Step Guide to Safe Acrylic Nail Removal
- Prep Your Workspace: Choose a well-ventilated area with good lighting. Protect your work surface with a towel in case of spills.
- File the Shine Off: Lightly buff the top surface of each acrylic nail with a nail file or buffer. This disrupts the acrylic’s smooth finish, allowing the acetone to penetrate more effectively.
- Soak It Up: Pour enough acetone into your bowl to comfortably submerge your fingertips.
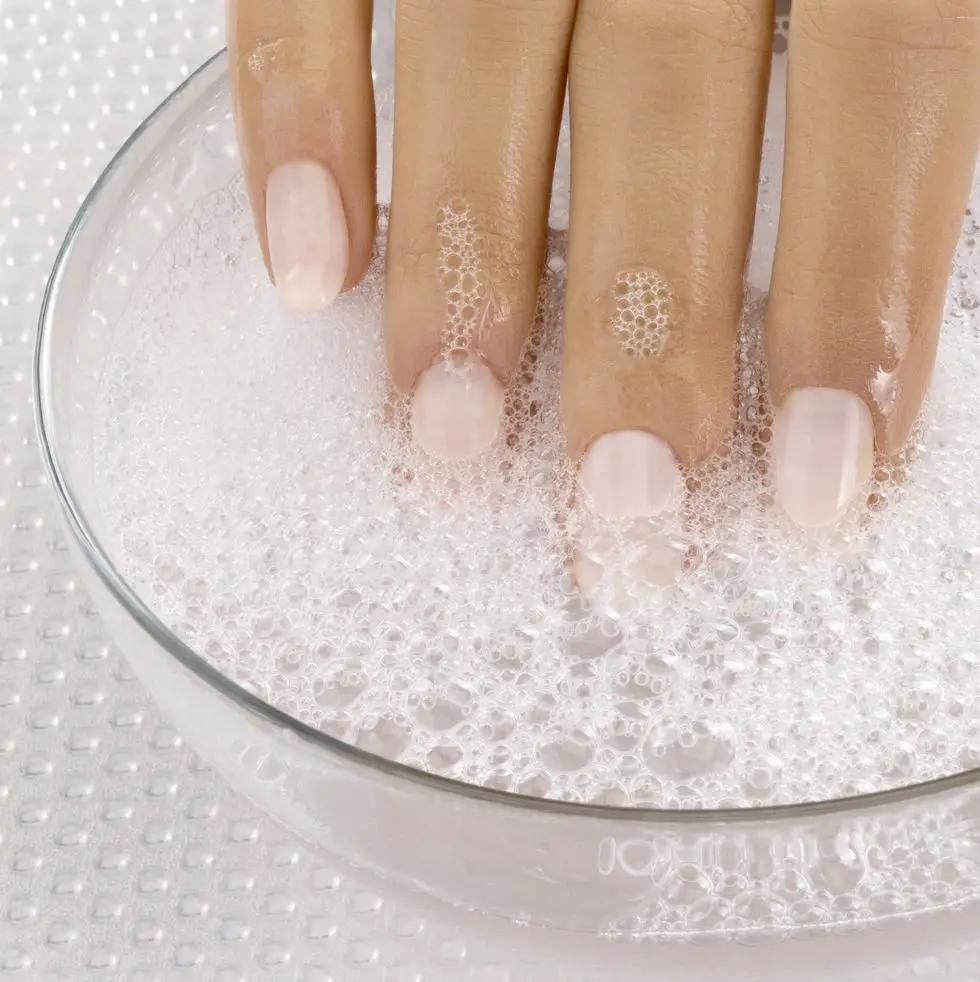
(Getty Images) - Embrace the Soak: Dip your fingertips into the acetone, ensuring all acrylic surfaces are submerged. Relax for 10-15 minutes.
- Test the Waters (Literally): After the soaking period, gently test one nail with an orangewood stick or cuticle pusher. If the acrylic lifts easily, proceed to the next step. If not, soak for an additional 5-minute increment and retest.
- Gentle Does It: Using the orangewood stick or cuticle pusher, carefully push under the lifted acrylic, working your way from the cuticle towards the free edge. Never pry or force the acrylic off! If resistance is met, re-soak the nail.
- Repeat & Reassess: Continue soaking and gently removing acrylics from each fingernail. Be patient and meticulous.
- Buff Away the Residue: Once all acrylics are removed, use a nail buffer to smooth any remaining unevenness on your natural nails.
- Moisturize, Replenish, Rejuvenate: Apply a generous amount of hand lotion or cuticle oil to hydrate your natural nails, which may feel dry and brittle after the removal process.
Pro-Tips for a Flawless Finish:
- Warm the Acetone (Optional): For faster removal, prepare a warm water bath and place your acetone-filled bowl inside for a few minutes before soaking your nails.
- Aluminum Foil Wrap (Optional): Cut small squares of aluminum foil and wrap each fingertip snugly after soaking the nails in acetone. This traps heat and can accelerate the removal process. However, use caution with this method, as prolonged contact with warm acetone can irritate the skin.
- Take Breaks: If your skin starts to feel dry or irritated, take a break from the acetone and soak your hands in warm water for a few minutes.
- Strengthen and Nourish: After removing the acrylics, focus on strengthening and nourishing your natural nails. Use a nail strengthener and cuticle oil regularly.
FAQs: Acrylic Removal Concerns Addressed
Can I use non-acetone removers for acrylic nails?
Non-acetone removers are generally less effective than pure acetone for dissolving acrylics. However, they may be a suitable option if you have sensitive skin or prefer to avoid harsh chemicals. Keep in mind that non-acetone removers often require longer soaking times and may not remove acrylics as thoroughly.
What if some acrylic residue remains after removal?
If minor acrylic residue persists after following the removal steps, you can gently buff the nail surface with a very fine-grit nail buffer. Avoid using coarse buffers, as they can damage your natural nails.
My natural nails feel weak and brittle after removing acrylics. What can I do?
It’s normal for natural nails to feel weakened after acrylic removal, as the acrylic layer can sometimes pull away natural nail oils. Here are some tips to strengthen and nourish your nails:
- Apply cuticle oil daily to hydrate and promote nail growth.
- Use a nail strengthener formulated for natural nails.
- Consider taking a biotin supplement, which may help strengthen nails (consult your doctor before starting any new supplements).
- Give your nails a break from polish and acrylics for a few weeks to allow them to recover.
I accidentally ripped off an acrylic nail! How do I prevent damage?
If you accidentally rip off an acrylic nail, avoid picking at the remaining acrylic or your natural nail bed. This can cause further damage and increase the risk of infection. Here’s what to do:
- Gently file away any remaining acrylic from the ripped nail.
- Disinfect the area with rubbing alcohol.
- Apply a bandage to protect the exposed nail bed.
- Focus on nourishing your natural nail with cuticle oil and consider using a nail strengthener.
- If you experience pain, swelling, or signs of infection, consult a doctor.
When should I seek professional help for acrylic removal?
While removing acrylics at home is safe for most people with healthy nails, consider professional removal if:
- You have very thin or damaged natural nails.
- You have concerns about damaging your nails.
- You have difficulty removing the acrylics yourself.
- You experience pain or discomfort during the removal process.
By following these steps and addressing any lingering concerns, you can achieve safe and effective acrylic nail removal at home, leaving your natural nails healthy and ready to shine on their own.
RELATED: 20 Trendy Baddie Nails To Slay Any Look: Stay On Fleek All Week Long
